Overview
*** This article is intended for Supervisor, Manager, and Admin users that need to review and edit employee timesheets. If you are an Employee looking to review and edit your own timesheets, head over to Reviewing and Editing Your Own Timesheets instead.
If you use When I Work Time Clock & Attendance to track worked hours, you can review pay periods and timesheets to monitor user’s hours and make any needed adjustments.
You can review and edit user’s timesheets from a computer or from the mobile applications on Android and iOS devices.
Important Timesheet Details
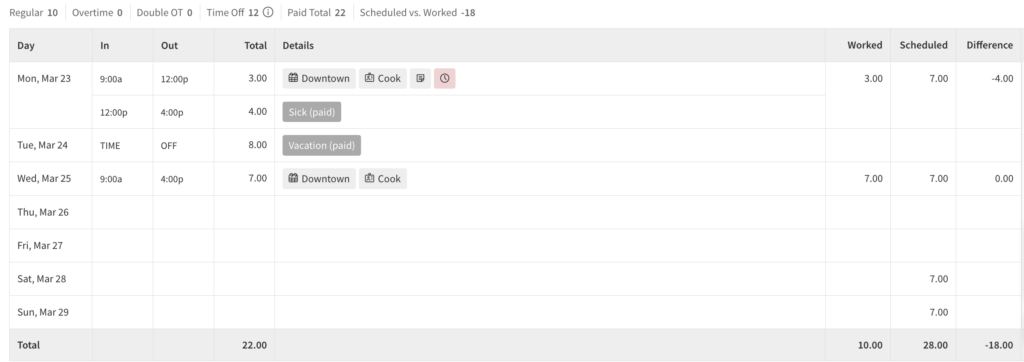
Timesheet summary
This appears just above the timesheet for a user and shows a breakdown of the employee’s hours for the pay period.
| 1 |
| Regular |
| Regular hours worked by the user. |
| 2 |
| Overtime |
| Overtime hours worked by the user, including weekly overtime and daily overtime. |
| 3 |
| Double OT |
| Daily double overtime hours worked by the user. |
| 4 |
| Time Off |
| All time off hours the user has that pay period. Hover over the icon to see a breakdown of time off types taken. |
| 5 |
| Paid Total |
| Combined total of all regular, overtime, double overtime, and paid time off hours |
| 6 |
| Scheduled Vs Worked |
The difference between the number of hours the user was scheduled to work and the number of hours the user actually worked.
|
| Callout | Name | Description |
| 1 | Regular | Regular hours worked by the user. |
| 2 | Overtime | Overtime hours worked by the user, including weekly overtime and daily overtime. |
| 3 | Double OT | Daily double overtime hours worked by the user. |
| 4 | Time Off | All time off hours the user has that pay period. Hover over the icon to see a breakdown of time off types taken. |
| 5 | Paid Total | Combined total of all regular, overtime, double overtime, and paid time off hours |
| 6 | Scheduled Vs Worked | The difference between the number of hours the user was scheduled to work and the number of hours the user actually worked.
|
Anatomy of a timesheet entry
Each timesheet entry can contain the following information:

| Callout | 1 |
| Name | Date |
| Description | The date of the entry. |
| Callout | 2 |
| Name | In |
| Description | The clock in time. |
| Callout | 3 |
| Name | Out |
| Description | The clock out time. |
| Callout | 4 |
| Name | Information |
| Description | Indicates that the timesheet entry crosses days. |
| Callout | 5 |
| Name | Total |
| Description | The hours worked between the clock in and clock out times. |
| Callout | 6 |
| Name | Lunch break |
| Description | The unpaid break duration in minutes. |
| Callout | 7 |
| Name | Schedule |
| Description | The schedule where the shift occurred. |
| Callout | 8 |
| Name | Position |
| Description | The position worked. |
| Callout | 9 |
| Name | Job site |
| Description | The job site where the shift took place. |
| Callout | 10 |
| Name | Notes |
| Description | Optional notes. |
| Callout | 11 |
| Name | Alert |
| Description | Indicates a late/early clock in/out or a clock in without a scheduled shift; Hover to view details. |
| Callout | 12 |
| Name | Break alerts |
| Description |
|
| Callout | 13 |
| Name | Details |
| Description | Click to view edits made to this timesheet entry. |
| Callout | 14 |
| Name | Add break |
| Description | Click the teacup to add paid break minutes and the burger to add unpaid break minutes. |
| Callout | 15 |
| Name | Worked |
| Description | The total number of hours worked on this date. |
| Callout | 16 |
| Name | Scheduled |
| Description | The number of hours scheduled to work on this date. |
| Callout | 17 |
| Name | Difference |
| Description | The difference between the number of scheduled hours and the actual worked hours.
|
| Callout | Name | Description |
| 1 | Date | The date of the entry. |
| 2 | In | The clock in time. |
| 3 | Out | The clock out time. |
| 4 | Information | Indicates that the timesheet entry crosses days. |
| 5 | Total | The hours worked between the clock in and clock out times. |
| 6 | Lunch break | The unpaid break duration in minutes. |
| 7 | Schedule | The schedule where the shift occurred. |
| 8 | Position | The position worked. |
| 9 | Job site | The job site where the shift took place. |
| 10 | Notes | Optional notes. |
| 11 | Alert | Indicates a late/early clock in/out or a clock in without a scheduled shift; Hover to view details. |
| 12 | Break alerts |
|
| 13 | Details | Click to view edits made to this timesheet entry. |
| 14 | Add break | Click the teacup to add paid break minutes and the burger to add unpaid break minutes. |
| 15 | Worked | The total number of hours worked on this date. |
| 16 | Scheduled | The number of hours scheduled to work on this date. |
| 17 | Difference | The difference between the number of scheduled hours and the actual worked hours.
|
The details items (callouts 4–14) might not be present for some timesheet entries, depending on the account settings, clock in method, clock in choices, and whether a shift was scheduled.
Timesheet entries that cross pay periods
If a timesheet entry crosses the boundary between pay periods, Information icon appears in the Out column.
- The hours for that entry are divided between the pay periods.
- Hover your pointer over Information icon to see how many hours are not included in this pay period.

Comparing timesheet entries to scheduled shifts
To see how timesheet entries correspond to scheduled shifts, click Show Shifts. Scheduled shifts appear in gray at the bottom of each date row.
Computer
Reviewing timesheets
Hover over Attendance, then select Timesheets.

- In the Pay Periods list, select the pay period that you want to view.
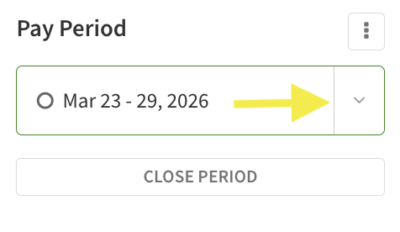 The icons in front of the pay periods indicate their status:
- Open circle indicates the pay period is open; Supervisors, Managers, and the Admin can make changes. Employees can make changes if allowed by the Attendance Settings.
- Check circle indicates the pay period is closed; no further changes can be made unless the pay period is re-opened by the Admin or a Manager with access to manage timesheets and pay periods.
- Click the user’s name under Timesheets on the left. The user’s timesheet appears.
- The box at the top shows a summary of the user’s hours for the pay period.
- The table shows the user’s timesheet entries for the pay period.
Editing Timesheets
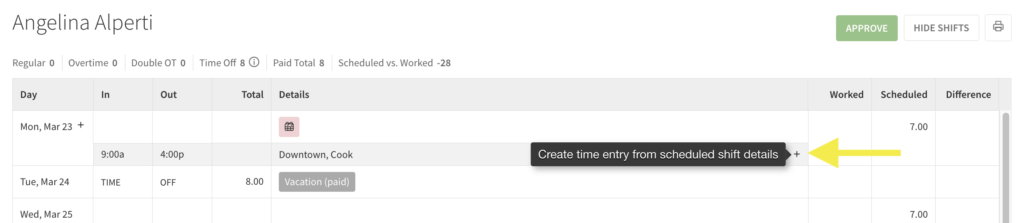
Add an entry based on a scheduled shift
If the user forgot to clock in and out for a shift, you can use the shift information to automatically create the timesheet entry.
- Once you are viewing a user’s timesheets, click Show Shifts.
- Find the shift that needs a timesheet entry.
- In the Details column, click at the right side of the shift. If the shift time has already passed, you will see a red calendar icon indicating the shift time entry is missing.
Add or edit a clock in or out time
Edit the clock in or out time if you need to correct an error, or if the user forgot to clock in or out.
- Click the cell that corresponds to the in or out time.
- Add or edit the time. Use “a” for A.M. and “p” for P.M.
For example, enter 8:45a for 8:45 A.M. - Press Enter or Return.
Add or edit time entry details
When a user clocks in for a shift, the details for the timesheet entry are filled in based on the shift. However, if the shift didn’t have the information or the user wasn’t scheduled to work, you may need to add details manually.
The timesheet entry details contain optional information, such as:
- Schedule
- Unpaid Break
- Paid Break
- Position
- Job site
- Notes
To change any of this information, hover your pointer over the details cell, then click an item to make changes.![]()
Add time off
- In the Day column, click Plus button, then click Time Off.
- In the pop up window, fill in the details of the time off and then click Send Request.
- This will automatically approve when a Supervisor, Manager, or Admin user adds this in a user timesheet.
Delete a timesheet entry
To delete a timesheet entry, clear the Out column first, then clear the In column times.
Mobile Applications
Note the steps are the same for both the Android and iOS applications, however the images below are from the Android app.
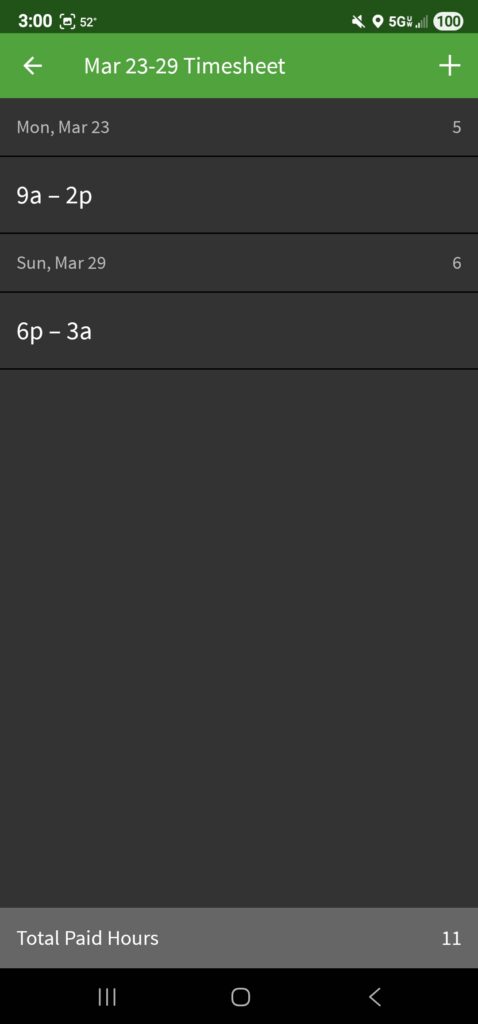
Reviewing timesheets
- From the When I Work Scheduling app, tap Attendance.
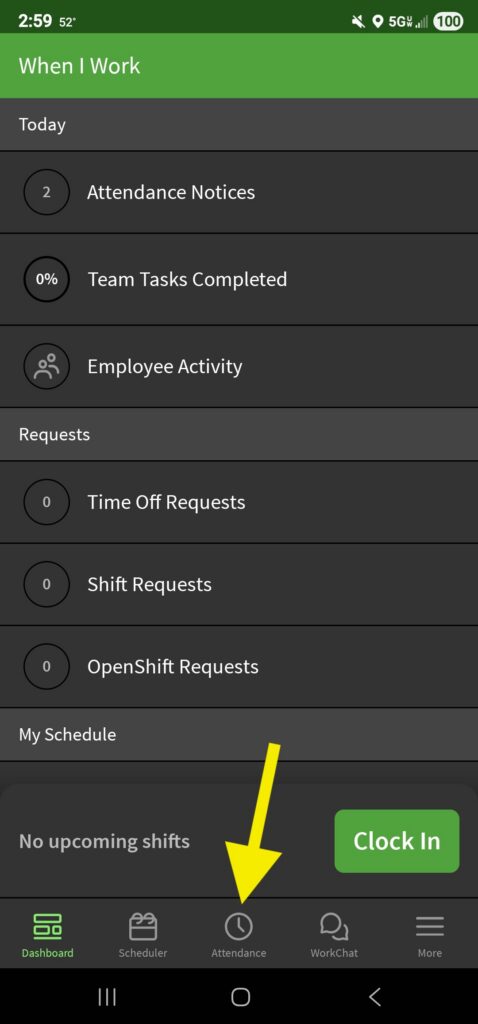
- Tap the pay period that you want to review.
- Open circle indicates the pay period is open; supervisors, managers, and the admin can make changes. Employees can make changes if allowed by the Attendance Settings.
- Note that on iOS an open pay period is indicated by not having any symbol on the right side of it.
- Solid circle indicates the pay period is closed; no further changes can be made unless the pay period is re-opened by the admin or a manager with access to manage payroll.
- Open circle indicates the pay period is open; supervisors, managers, and the admin can make changes. Employees can make changes if allowed by the Attendance Settings.
- If you select an open pay period, you see a list of users that have clocked in during the pay period. Selecting a closed pay period will instead show a summary of each user’s total hours worked and estimated labor costs for the pay period.
- Tap the user you want to view timesheets for to see a list of their entries for that pay period.
Editing Timesheets
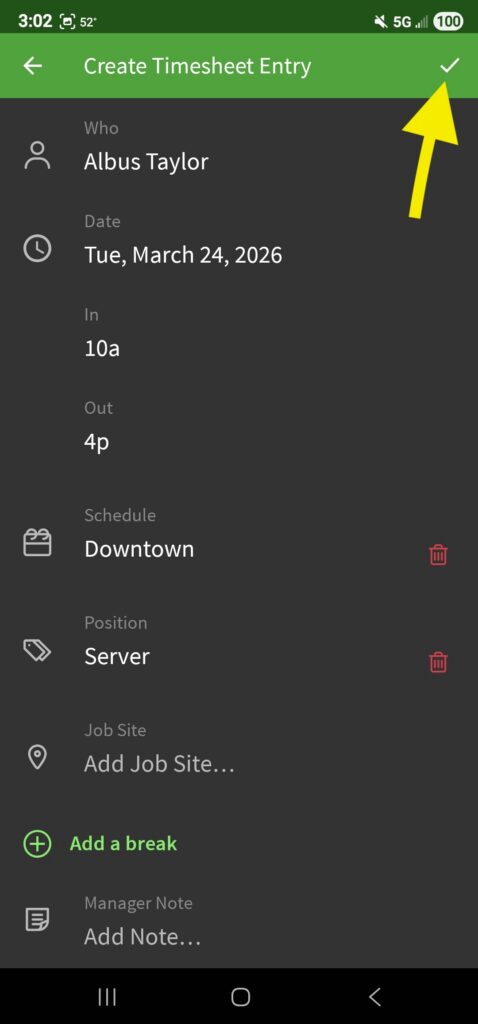
Add an entry
- From a user’s timesheet, tap Plus button in the top-right corner of the screen.
- Select the proper timesheet entry details. The Date, Clock-In Time, and Schedule are required to save an entry. You may also include the Clock-Out Time, Position, Job Site, and Notes. When you’re finished, tap Checkmark button in the top-right corner of the screen. (On the iOS application, you will see Add instead of a checkmark).
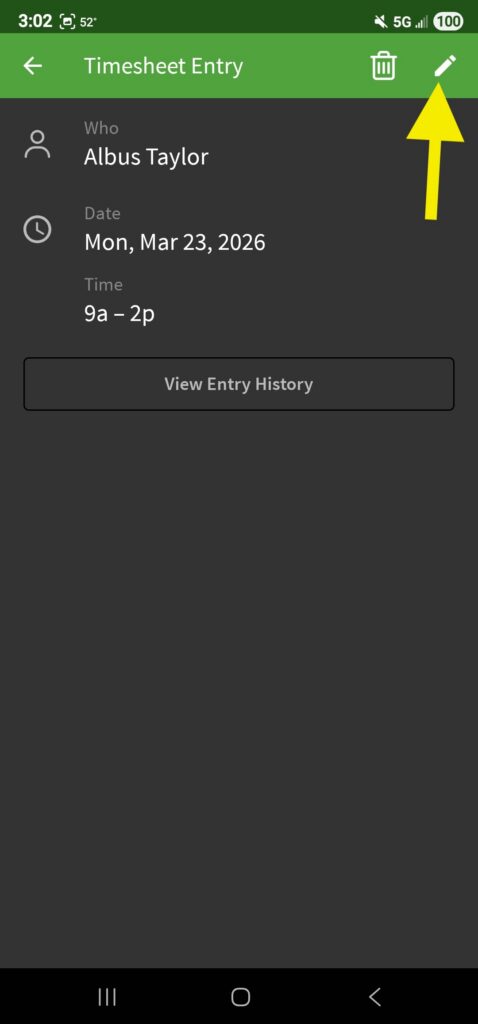
Edit an Existing Entry
- From the user’s timesheet, tap the timesheet entry that you’d like to change.
- In the top-right corner of the screen, tap Pencil button. (On the iOS application, you will Edit instead of the pencil).

- Make the changes to the timesheet entry and then tap Checkmark button to save those changes. (On the iOS application, you will see Save instead of a checkmark).
Delete an Entry
- From the user’s timesheet, tap the timesheet entry that you’d like to change.
- In the top-right corner of the screen, tap Trash button.
- On the iOS application, you will instead tap on Delete Timesheet Entry at the bottom of the screen.
- Tap Delete or Delete Timesheet Entry when the confirmation message appears.