Overview
Use annotations to send your staff important information about a particular day. You can send a general announcement, let your staff know that time off isn’t allowed, or let your staff know that your business will be closed that day.
Annotations can be managed from a Computer or from the Android and iOS mobile applications.
Considerations
- You must have supervisor, manager, or admin access privileges to add annotations. If you’re a supervisor, you can add annotations for your schedules only.
- Only one annotation can appear at a time in the “Important Upcoming Date” section of My Schedule. The exception is if there are annotations on the same day within different schedules.
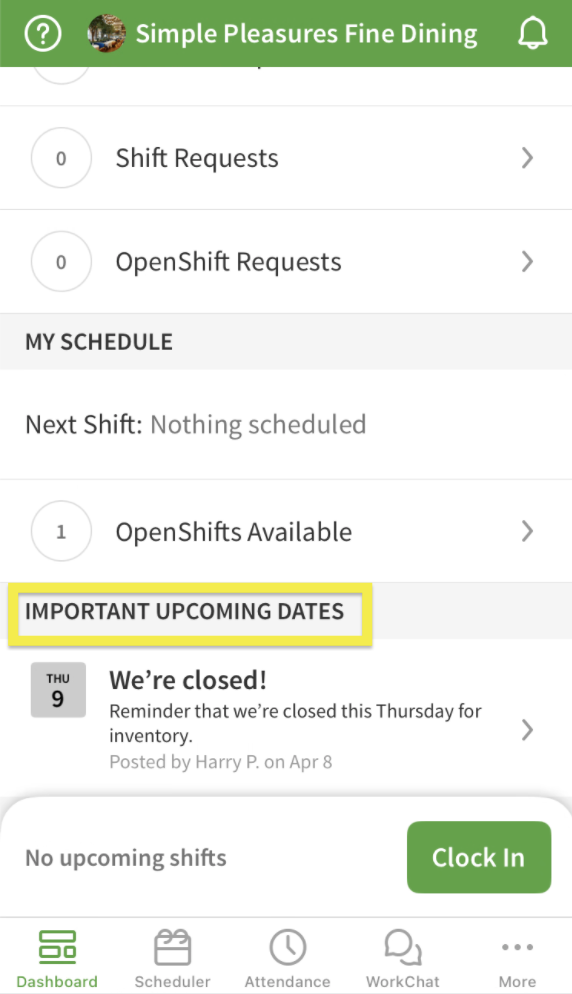
- Only announcement annotations appear on the Dashboard and schedule in the iOS and Android mobile apps.
- Users cannot click URLs that you enter in the annotation message. However, they can manually type the URL into a web browser.
Types of annotations
Each annotation has one or more types that determine how the annotation is displayed to your employees. An annotation can have one, two, or all three types.
| Type | Business Closed |
| Description |
Posts a message to the Schedule view that indicates your business is closed on the selected days. NOTE: If a ‘Business Closed’ annotation is added to a date with published shifts, you have the option to:
|
| Type | Don’t Allow Time Off |
| Description |
Posts a message to the Schedule view that indicates time time off isn’t allowed on the selected days, and prevents staff from submitting time off requests. supervisors and managers can still submit time off requests for those days for themselves and on behalf of employees. |
| Type | Announcement |
| Description | Posts a message to the Schedule view and dashboard¹ that applies to the selected days. |
| Type | Description |
| Business Closed |
Posts a message to the Schedule view that indicates your business is closed on the selected days. NOTE: If a ‘Business Closed’ annotation is added to a date with published shifts, you have the option to:
|
| Don’t Allow Time Off |
Posts a message to the Schedule view that indicates time time off isn’t allowed on the selected days, and prevents staff from submitting time off requests. supervisors and managers can still submit time off requests for those days for themselves and on behalf of employees. |
| Announcement | Posts a message to the Schedule view and dashboard¹ that applies to the selected days. |
** Mobile apps only; iOS displays annotations that occur in the next eight days (including today), Android displays annotations that occur in the next seven days (including today).
** When adding a ‘Business Closed’ annotation on the mobile applications, there is no prompt on how to handle published shifts. You will need to migrate to the web app to manage those if needed.
Computer
Add an annotation
Click Scheduler.
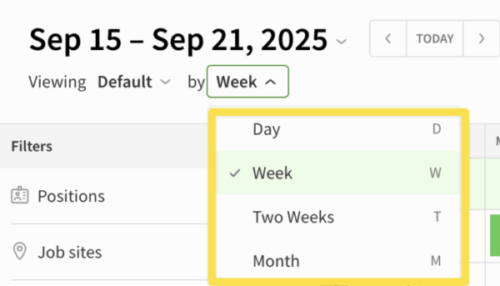
- Make sure you’re in week view. The time picker drop-down menu should display Week.
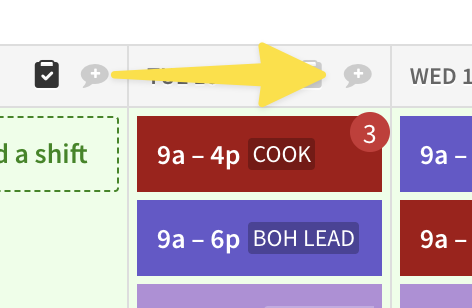
- Next to the date in the column header of the schedule, click .
- Set up the annotation.

Callout Name Description a Dates (Required) Select the Start Date and End Date. b Pencil button (Optional) Select the color you want the annotation to be highlighted in. c Schedules (Required) Select which schedules the annotation applies to. d Title Enter a title for the annotation. e Message (Optional) Enter a message for employees to go along with the annotation. f Type (Required) Select which type of annotation you want to add. Callout Name Description a Dates (Required) Select the Start Date and End Date. b Pencil button (Optional) Select the color you want the annotation to be highlighted in. c Schedules (Required) Select which schedules the annotation applies to. d Title Enter a title for the annotation. e Message (Optional) Enter a message for employees to go along with the annotation. f Type (Required) Select which type of annotation you want to add. - Click Save. After you save, the annotation appears in the When I Work app. Annotations appear in different areas of the app depending on which type you add.
Edit an annotation
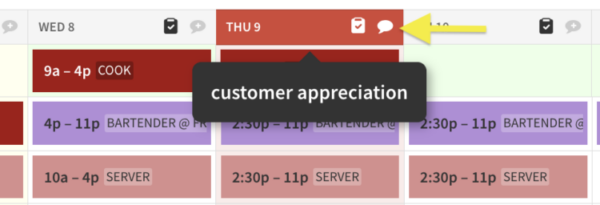
- In week view of the scheduler, locate the day where an annotation exists. (This will be indicated by a color or dark gray back ground on the date display and the annotation chat bubble will be filled in.)
- Click on the chat bubble to open the existing annotation details.
- Edit the details you need to change and then click Save.
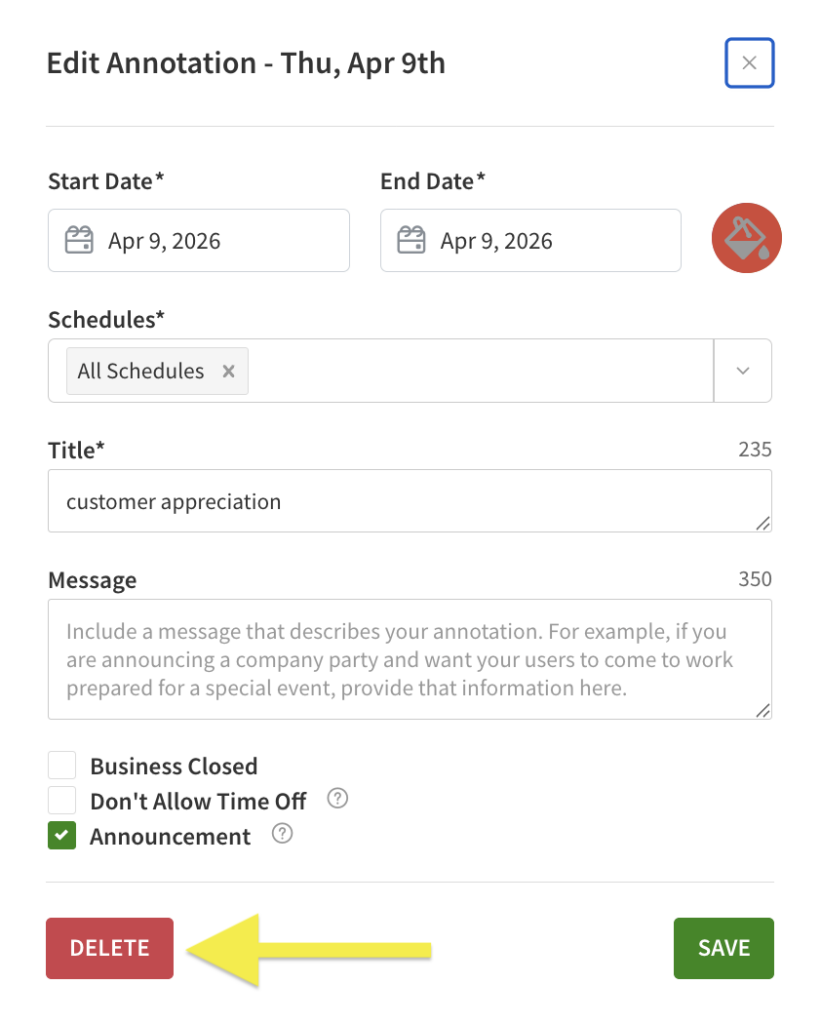
Delete an annotation
- In week view of the scheduler, locate the day where an annotation exists. (This will be indicated by a color or dark gray back ground on the date display and the annotation chat bubble will be filled in.)
- Click on the chat bubble to open the existing annotation details.
- Click Delete at the bottom of the details window.
Android
Add an annotation
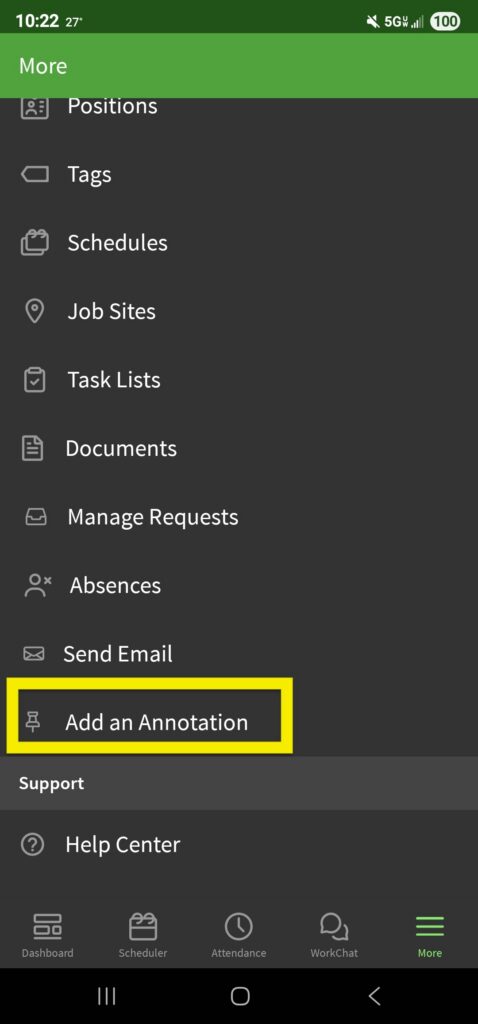
- From the When I Work Scheduling app, tap More in the bottom-right corner of the screen.
- Tap Add an Annotation.
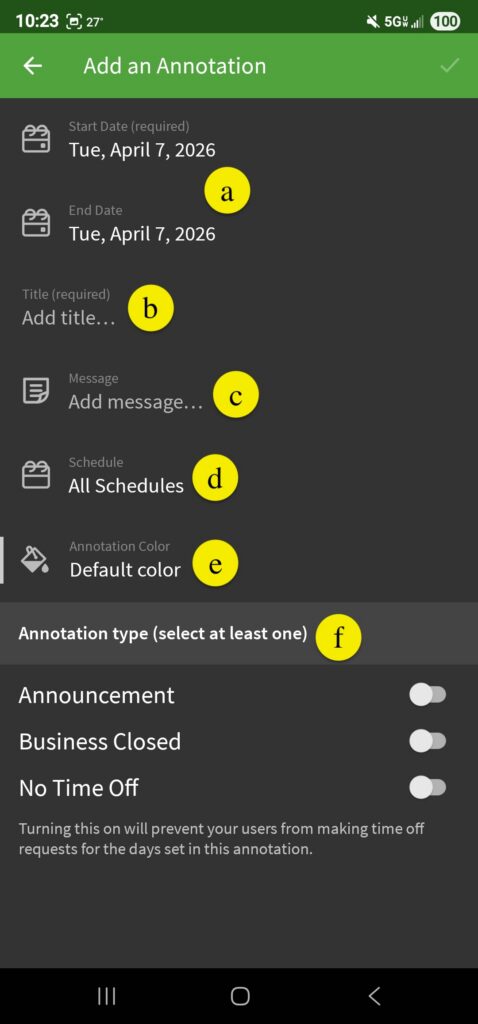
- Set the annotation details.
- When you are finished with all the details, tap the icon in the top right corner to save.
| Callout |
| Description |
| a |
| Set the start and end date for the annotation to display |
| b |
| Add a title for the annotation that will be displayed to your staff |
| c |
| Add an optional message to provide more detail to your team |
| d |
| Select which schedules this annotation will appear on |
| e |
| Choose a color for the annotation |
| f |
| Select one or more annotation types by toggling it on |
| Callout | Description |
| a | Set the start and end date for the annotation to display |
| b | Add a title for the annotation that will be displayed to your staff |
| c | Add an optional message to provide more detail to your team |
| d | Select which schedules this annotation will appear on |
| e | Choose a color for the annotation |
| f | Select one or more annotation types by toggling it on |
Edit an annotation
- In the When I Work Scheduling app, scroll down to the Important Upcoming Dates section.
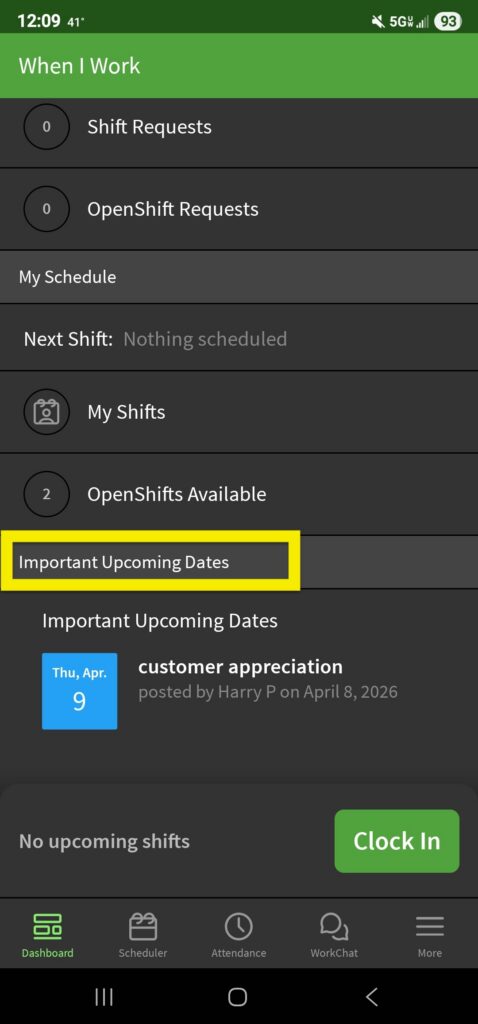
- Android displays annotations that occur in the next seven days (including today).
- To edit annotations further than 7 days from now, tap on Scheduler and then navigate to the date it is located. The annotation will be located at the top of the date above all shifts.
- Tap on the Annotation to open the details and then tap the icon in the top right corner to edit.
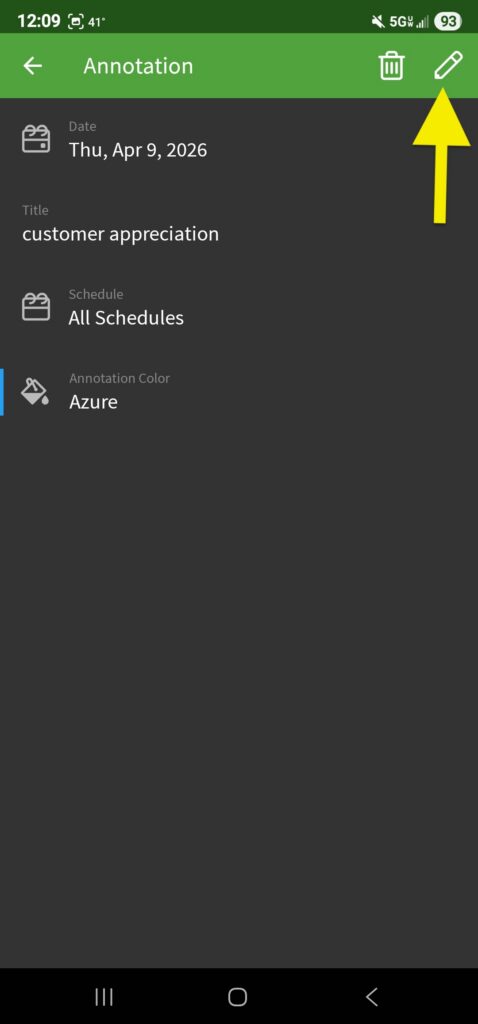
- After making the edits needed, tap to save your changes.
Delete an annotation
- In the When I Work Scheduling app, scroll down to the Important Upcoming Dates section.
- Android displays annotations that occur in the next seven days (including today).
- To delete annotations further than 7 days from now, tap on Scheduler and then navigate to the date it is located. The annotation will be located at the top of the date above all shifts
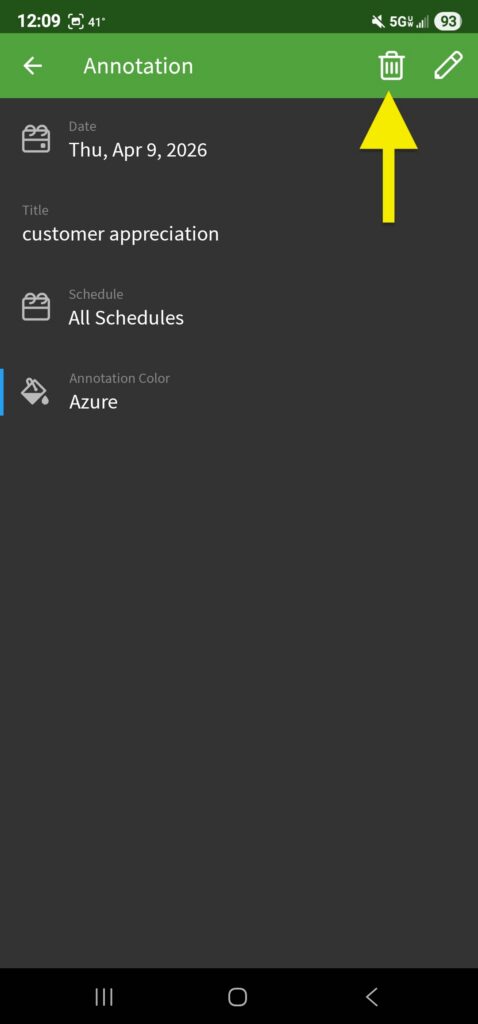
- Tap on the Annotation to open the details and then tap the icon in the top right to delete the annotation.
iOS
Add an annotation
- From the When I Work Staff Scheduling app, tap More in the bottom-right corner of the screen.
- Scroll down to manager Tools.
- Tap Add an Annotation.
- Set the annotation details. Once all details are set, tap Save in the top right corner to save the annotation.
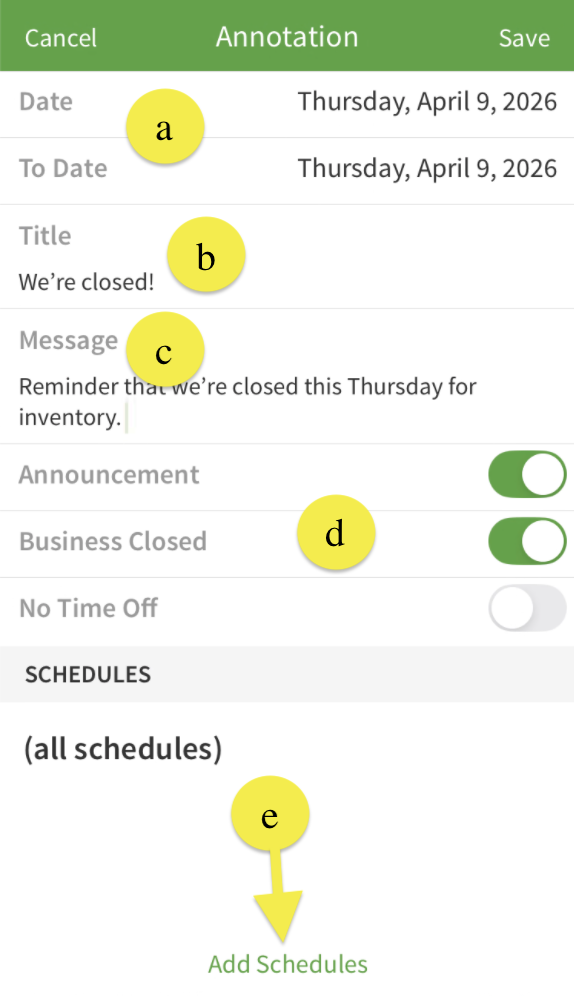
Callout Description a Set the start and end date for the annotation b Add a title to display for your staff c Add an optional message for your staff d Select one or more annotation types by toggling them on e Tap the Add Schedules button if you need to select specific schedules for the annotation to appear on, otherwise it will display on all schedules Callout Description a Set the start and end date for the annotation b Add a title to display for your staff c Add an optional message for your staff d Select one or more annotation types by toggling them on e Tap the Add Schedules button if you need to select specific schedules for the annotation to appear on, otherwise it will display on all schedules
Edit an annotation
- From the When I Work Staff Scheduling app, scroll down to Important Upcoming Dates at the bottom of the dashboard.
- iOS displays annotations that occur in the next eight days (including today).
- To edit annotations further than 8 days from now, tap on Scheduler and then navigate to the date it is located. The annotation will be located at the top of the date above all shifts.
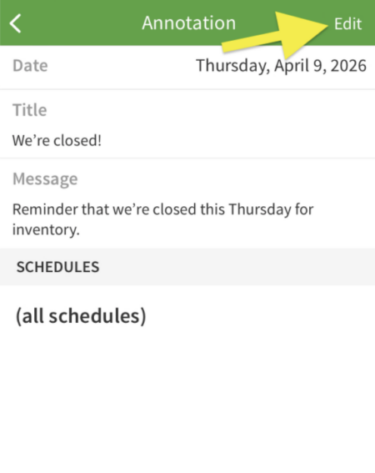
- Tap on the annotation to select it and then tap Edit in the top right corner.
- Change the details you need to edit and then tap Save in the top right to save those changes.
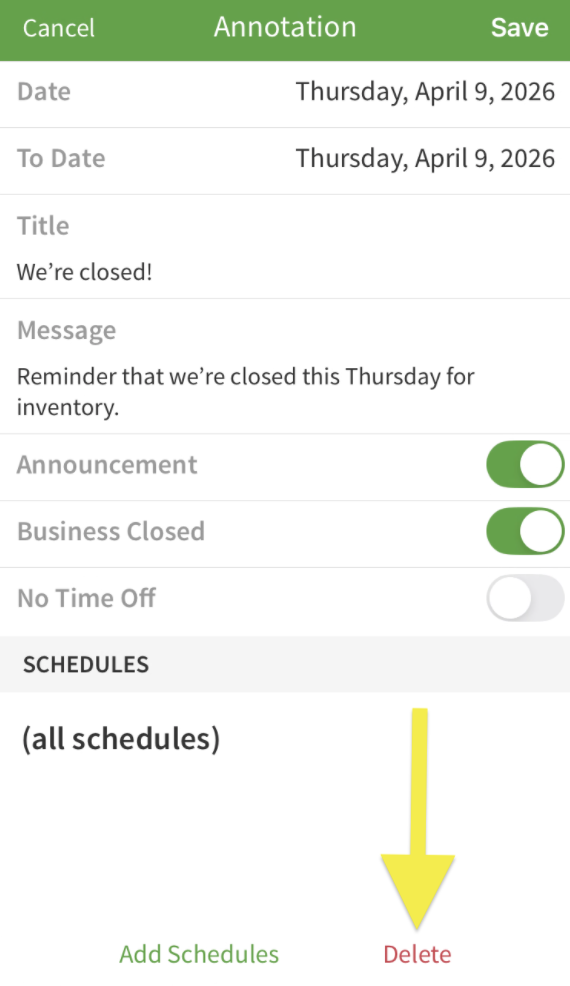
Delete an annotation
- Navigate as if you are going to Edit an annotation.
- In the open details, instead of editing, tap on the red Delete option at the bottom to delete the annotation.