Overview
Add users and manage their information to make sure their profiles are configured to fit your needs. In addition to their contact information, your user’s profiles contain their assigned schedules, positions, and wage information.

Considerations
- Supervisors can edit user’s profiles who are assigned to their same schedules.
- If you set up time clock terminals, make sure your users are assigned employee IDs. Employees can view their employee ID on their mobile app.
- If you need to add multiple users, you can speed up the process by importing users from a spreadsheet.
- If you would like to add a previously archived user, check out Reactivating Archived Users.
Add a user
Adding a user can be done from a Computer or from the Android or iOS mobile applications. Note that not all details can be added/edited from the mobile applications.
From a Computer
Hover over , then select Users.
- In the top-right corner of the screen, click Add.
The Add User window appears.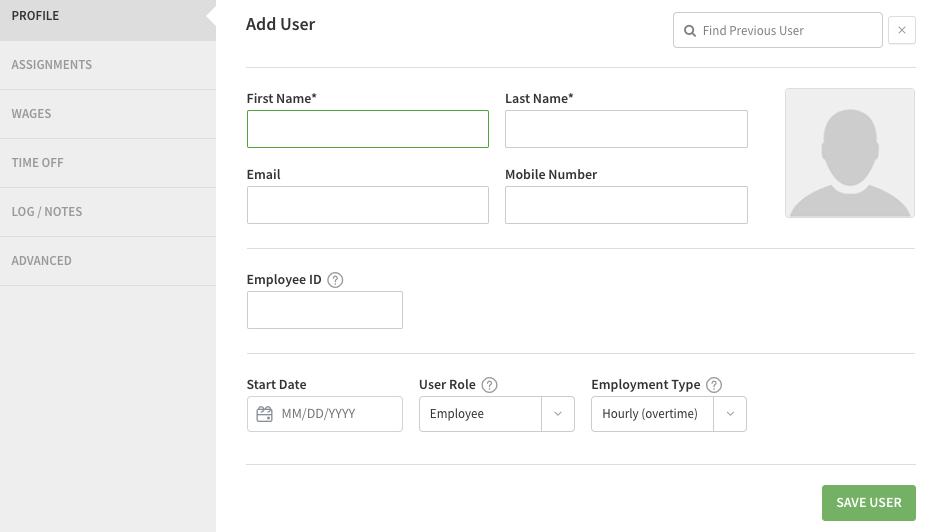
- Add the user’s contact information:
- First Name and Last Name are required.
- If you want to invite the user now, add their Email Address, Mobile Number, or both.
- Add an Employee ID to be used with Attendance
- Including a Start Date will sync with any Time Off Accrual Policies that you have set up.
- Set the user’s access level using the Role menu.
- Setting the Employment Type will impact if this user’s hours will calculate Overtime or not.
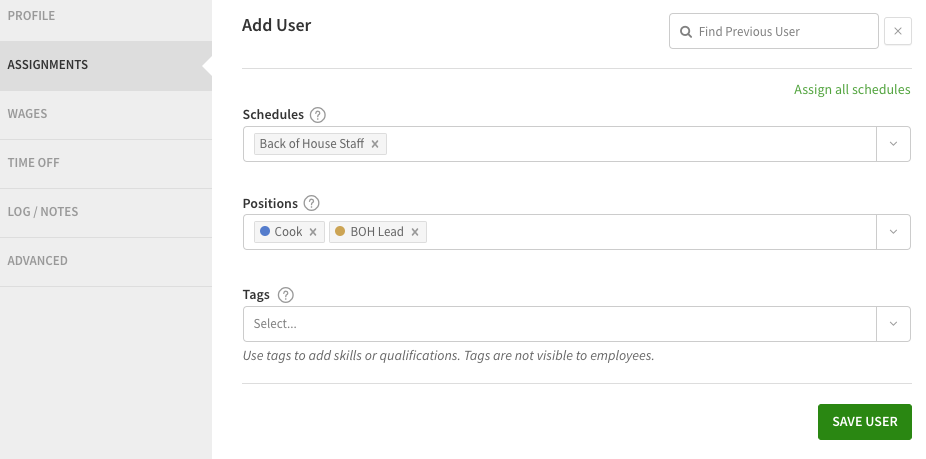
- Use the Assignments tab to assign the user to Schedules, Positions, and Tags.
- Add the user’s wage information on the Wages tab.

- Here you can add a Base Hourly Rate of pay for the user
- You can also add a pay rate for each position the user works
- Set a Max Hours to help keep on top of budgets
- Use the Time Off tab to set up any time off balances for the user and see any accrual policies they are enrolled in.
- Use the Advanced Details tab to set extra info. You might want to do so if:
- You want the user hidden from the schedule
- You want to allow the user access to edit their own timesheets
- You want to give a supervisor or manager additional access
- You want to disable attendance alerts for this user
- Click Add User.
From an Android
- From the When I Work Scheduling app, tap More in the bottom right corner of the screen
- Tap Users.
- Tap in the top-right corner of the screen.
- Add the user’s details.

- When you’re finished, tap Checkmark button in the top-right corner of the screen.
From an iOS Device
- From the When I Work Staff Scheduling app, tap More in the bottom-right corner of the screen.
- Tap Users.
- Tap in the top-right corner of the screen.
- Add the user’s details:

- When you’re finished, tap Save in the top right corner of the screen. Tap Save again to confirm.
Edit a user
Hover over , then select Users.
- Double click on the name of the user you’d like to edit.
The Edit User window appears.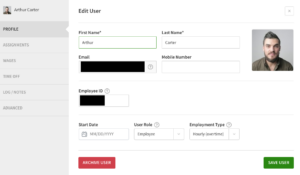
- Make the necessary changes.
- When you’re finished, click Save User.
User details reference
If you’re adding a new user or editing an existing user, you can modify the details in their profile.
User Details

| a |
| First Name |
| Edit the user’s first name. |
| b |
| Last Name |
| Edit the user’s last name |
| c |
|
Displays the email address the user has registered. Only the user can edit their email address once they’ve registered their profile. |
| d |
| Mobile Number |
| Edit the user’s mobile number. |
| e |
| Profile Photo |
| Click Pencil button to add or update the user’s profile photo. |
| f |
| Employee ID |
| Edit the employee’s id |
| g |
| Start Date |
| Enter the employee’s employment start date |
| h |
| User Role/Access Level |
| Click Down icon to change the user’s access privileges. |
| i |
| Employment Type |
| Click Down icon to select whether this user’s hours will calculate overtime or not |
| j |
| Archive User |
| Click to deactivate the user profile and remove the employee from the schedule. See Archive a User. |
| Callout | Name | Description |
| a | First Name | Edit the user’s first name. |
| b | Last Name | Edit the user’s last name |
| c |
Displays the email address the user has registered. Only the user can edit their email address once they’ve registered their profile. |
|
| d | Mobile Number | Edit the user’s mobile number. |
| e | Profile Photo | Click Pencil button to add or update the user’s profile photo. |
| f | Employee ID | Edit the employee’s id |
| g | Start Date | Enter the employee’s employment start date |
| h | User Role/Access Level | Click Down icon to change the user’s access privileges. |
| i | Employment Type | Click Down icon to select whether this user’s hours will calculate overtime or not |
| j | Archive User | Click to deactivate the user profile and remove the employee from the schedule. See Archive a User. |
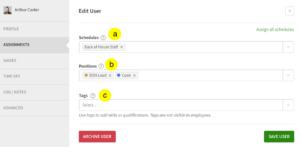
Assignments
| a |
| Schedules |
|
Edit the user’s Schedules where they’ll work. Removing a user from one of their assigned Schedules moves their future scheduled shifts to OpenShifts. This cannot be reversed. |
| b |
| Positions |
| Edit the user’s Positions they’re qualified to work. |
| c |
| Tags |
| Edit the user’s Tags for an additional layer of eligibility on top of Positions. |
| Callout | Name | Description |
| a | Schedules |
Edit the user’s Schedules where they’ll work. Removing a user from one of their assigned Schedules moves their future scheduled shifts to OpenShifts. This cannot be reversed. |
| b | Positions | Edit the user’s Positions they’re qualified to work. |
| c | Tags | Edit the user’s Tags for an additional layer of eligibility on top of Positions. |
Wages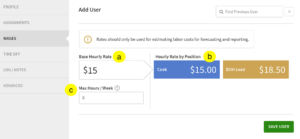
If you’d like to view labor costs while you make the schedule, or if you’re using Time Clock & Attendance to track worked hours, set up pay rate information on the Hourly Rates tab.
| Callout | a |
| Name | Base Hourly Rate |
| Description | Set the user’s base hourly rate regardless of the position they work. |
| Callout | b |
| Name | Hourly Rate by Position |
| Description | If a user is qualified to work multiple positions and earns different rates depending on the position they’re scheduled for, enter a value to increase or decrease their base hourly rate.
|
| Callout | c |
| Name | Max Hours/Week |
| Description | Enter the max number of hours a user should work per week. |
| Callout | Name | Description |
| a | Base Hourly Rate | Set the user’s base hourly rate regardless of the position they work. |
| b | Hourly Rate by Position | If a user is qualified to work multiple positions and earns different rates depending on the position they’re scheduled for, enter a value to increase or decrease their base hourly rate.
|
| c | Max Hours/Week | Enter the max number of hours a user should work per week. |
Time Off
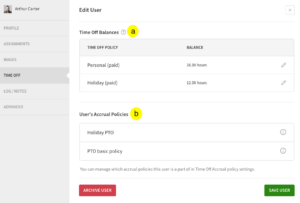
| a |
| Time Off Balances |
| View the current balance for each paid time off |
| b |
| User’s Accrual Policies |
| View which policies the user is a part of |
| Callout | Name | Description |
| a | Time Off Balances | View the current balance for each paid time off |
| b | User’s Accrual Policies | View which policies the user is a part of |
Log/Notes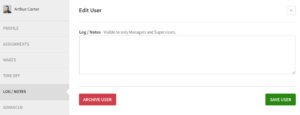
If you want to add miscellaneous notes about the user, click the Log / Notes tab. There is no character limit, so feel free to input as many notes as you’d like.
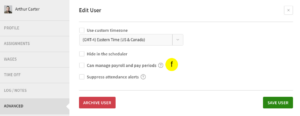
Advanced Details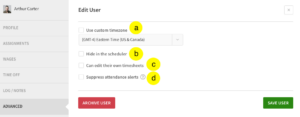
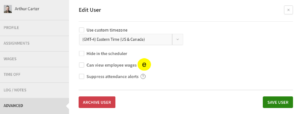
| a |
| Use Custom Time Zone |
|
If your user is located in a time zone different from your own, click the box next to Custom Time Zone and then select the their time zone from the drop down. With a custom time zone set, the user sees the shifts you schedule in your time zone translated into their custom time zone. |
| b |
| Hide in the Scheduler |
| Check the box if you’d like to hide the user from the schedule. |
| c |
| Can edit their own timesheets |
| Grants this individual user access to edit their own timesheet entries |
| d |
| Suppress attendance alerts |
| Prevents attendance notices to be triggered by this user when they don’t clock in/out for scheduled shifts. |
| e |
| Can View Employee Wages |
| (Supervisor level access only) Check the box to allow a supervisor to view employee wages. |
| f |
| Can Manage Timesheets and Pay Periods |
| (Manager level access only) Check the box to allow a manager to manage pay period settings and close pay periods. |
| Callout | Name | Description |
| a | Use Custom Time Zone |
If your user is located in a time zone different from your own, click the box next to Custom Time Zone and then select the their time zone from the drop down. With a custom time zone set, the user sees the shifts you schedule in your time zone translated into their custom time zone. |
| b | Hide in the Scheduler | Check the box if you’d like to hide the user from the schedule. |
| c | Can edit their own timesheets | Grants this individual user access to edit their own timesheet entries |
| d | Suppress attendance alerts | Prevents attendance notices to be triggered by this user when they don’t clock in/out for scheduled shifts. |
| e | Can View Employee Wages | (Supervisor level access only) Check the box to allow a supervisor to view employee wages. |
| f | Can Manage Timesheets and Pay Periods | (Manager level access only) Check the box to allow a manager to manage pay period settings and close pay periods. |
Search user list
Use the left sidebar to search for specific users.
- Click the search bar.
- Type the name of the user you want to find. The list is filtered to your search criteria automatically.

Filter user list
Use the left sidebar to filter users based on roles, positions, tags, and schedules.
- Click next to roles, positions, tags, or schedules.
- Click the next to the specific entity to deselect it.
